
- Advantages of using Amazon’s EC2 service with R
- Short and Easy Installation
- Detailed, longer yet more flexible installation
- Logging in to your RStudio from anywhere
- Using RStudio’s system terminal to install MySQL
- Wrapping it all up
In my previous post Databases in the Cloud: Amazon Relational Database , I reviewed some of the benefits Amazon Web Services has to offer. Amazon EC2 is just another great service offered by Amazon. Simply speaking, EC2 is a virtual server that offers different software stacks and computational power.
EC2 allows users to build apps, automate scaling according to changing needs and peak periods, deploy computational intensive models, streamline development processes, and create virtual servers lessening the need to invest in infrastructure.
Advantages
Two major advantages of using EC2 is that you’re not locked into one operating system or one configuration setup. You can go from a standard operating system running 1GB ram to a GPU equipped OS with 60+ GB ram that can handle a wide range of tasks. You can easily change your instance type in minutes; just stop your instance, modify the instance type, and start the instance again to run more/less power than before. This goes hand in hand with R and RStudio due to R’s in-memory architecture.
Benefits to R
Memory, memory, and more memory. If you ever cross a dataset that just eats your computers RAM away, you can easily pay <$0.80 hour to use a $10,000 GPU that will cut right through any compute-intensive operations. It can get up to 60-90% cheaper when using a “spot instance” compared to an “on-demand instance”. See this post On-Demand vs Reserved vs Spot AWS EC2 Pricing Comparison to learn the differences between a spot, on-demand, and reserved instance.
Two Ways to Install / Run RStudio on an EC2
There are two ways that we can create an EC2 and install R & RStudio. The first way is the “Short and Easy Way” which will get RStudio up and running quickly, and you will get easy access to dropbox. The second way is the “Detailed and Longer Way” which has a more flexible configuration setup.
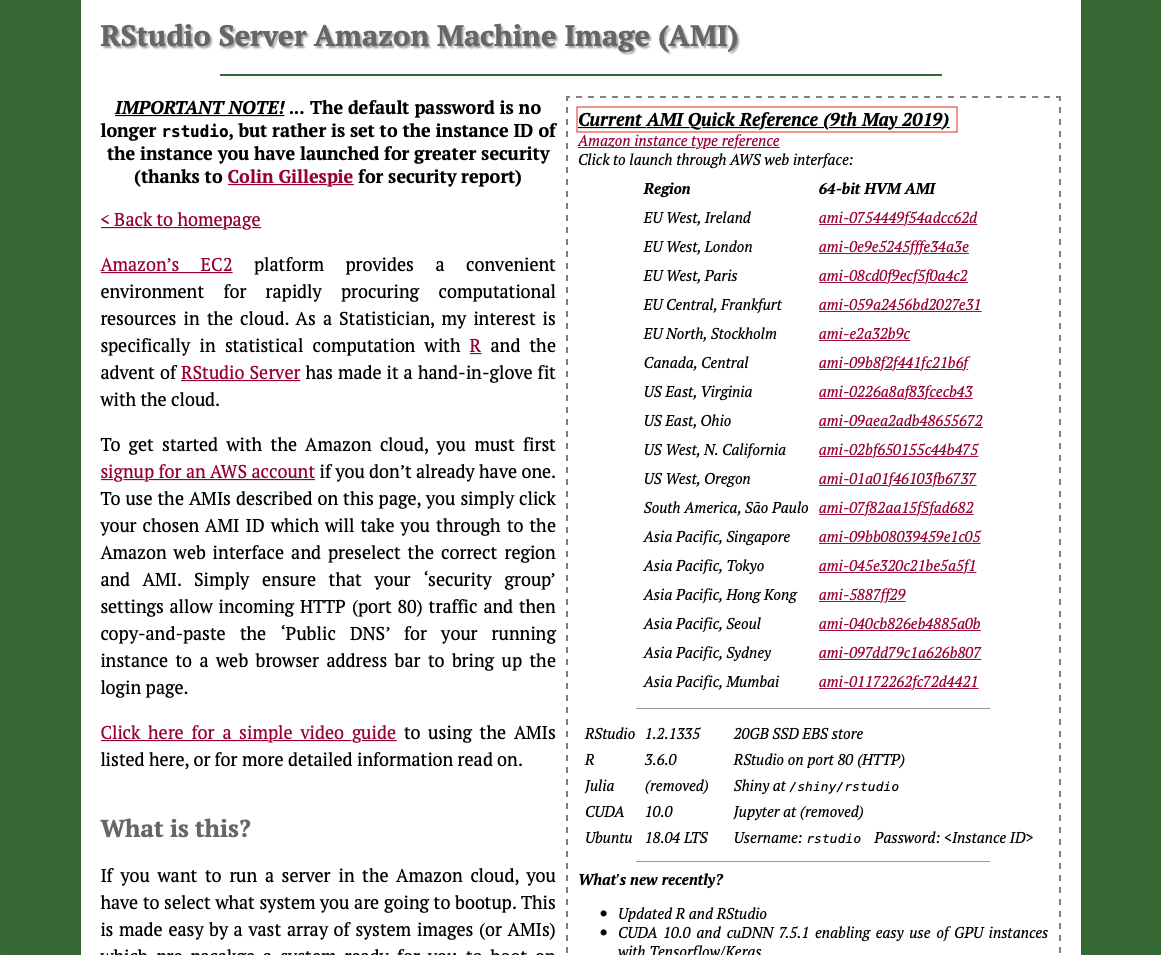
The first way is “Short and Easy” but only because of the hard work that Louis Aslett put into creating/maintaining this RStudio AMI. An AMI (Amazon Machine Image) is a template for your systems software configuration for your instance. AMI defines things like which operating system is installed on your EC2 instance and which software is included. Louis was kind enough to do all of the dirty work needed (plus more) to create an instance that will allow us to run RStudio on AWS. His AMI allows you to get up and running with RStudio and a seamless Dropbox integration in under 10 minutes, so I appreciate his time for maintaining this AMI!
To truly appreciate what he has done, you must go through the next option. The second way is starting from scratch and configure everything yourself. For those who want to get their hands dirty and start from scratch, then jump here to the detailed, long way. You will have a lot more flexibility (and possibly learn more along the way) which is great if you plan on using other applications other than RStudio. If your looking to create an instance and have RStudio running all within 5 minutes, then please continue along!
Short and Easy
You have to go through the “long way” to really appreciate how much time your saving by doing it this way. If you just need to quickly create an AWS instance to run RStudio on, then this is your best bet.
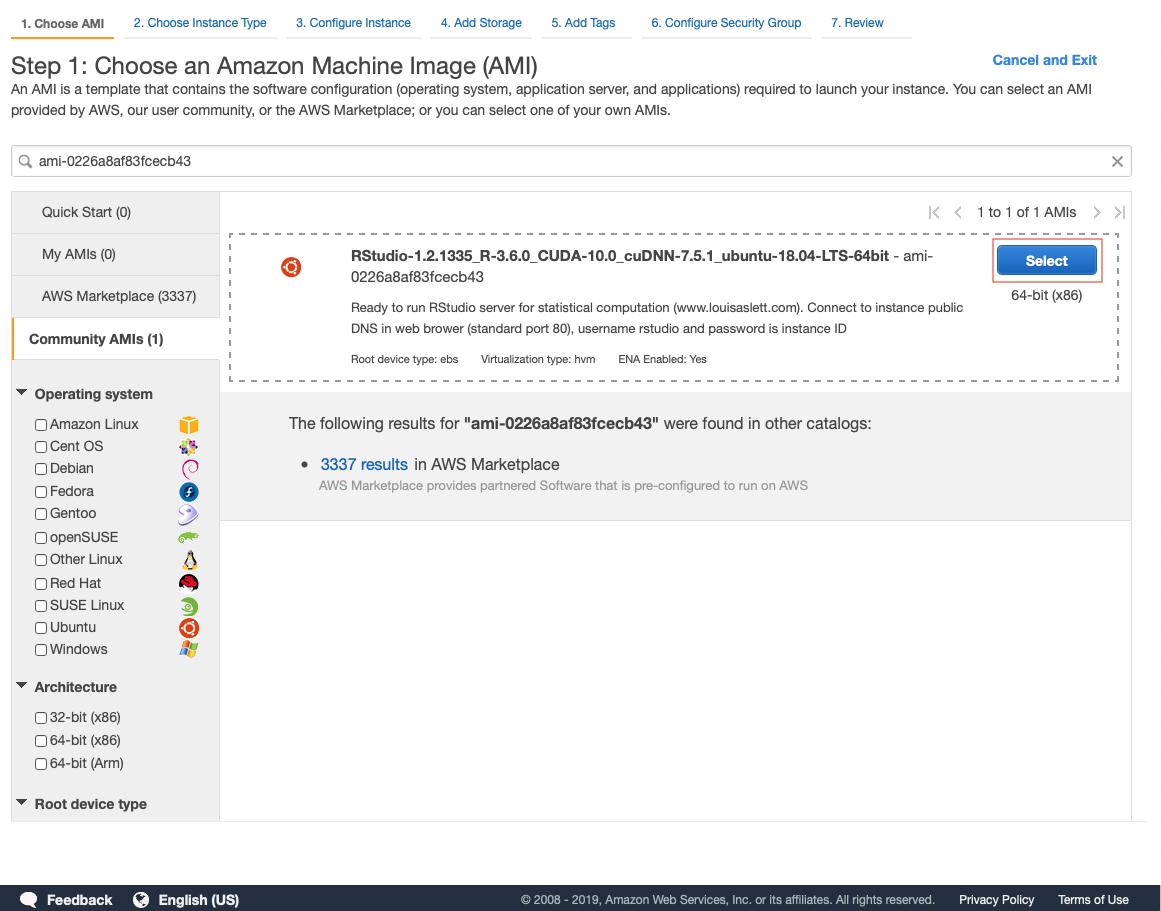
Step 1: Choosing AMI
Click the link for Louis Aslett’s RStudio AMI and view the most recent AMI specs on the right side of the screen. Click the region nearest to you, and a new instance will automatically be created using this AMI, taking you to step 2 of the process.
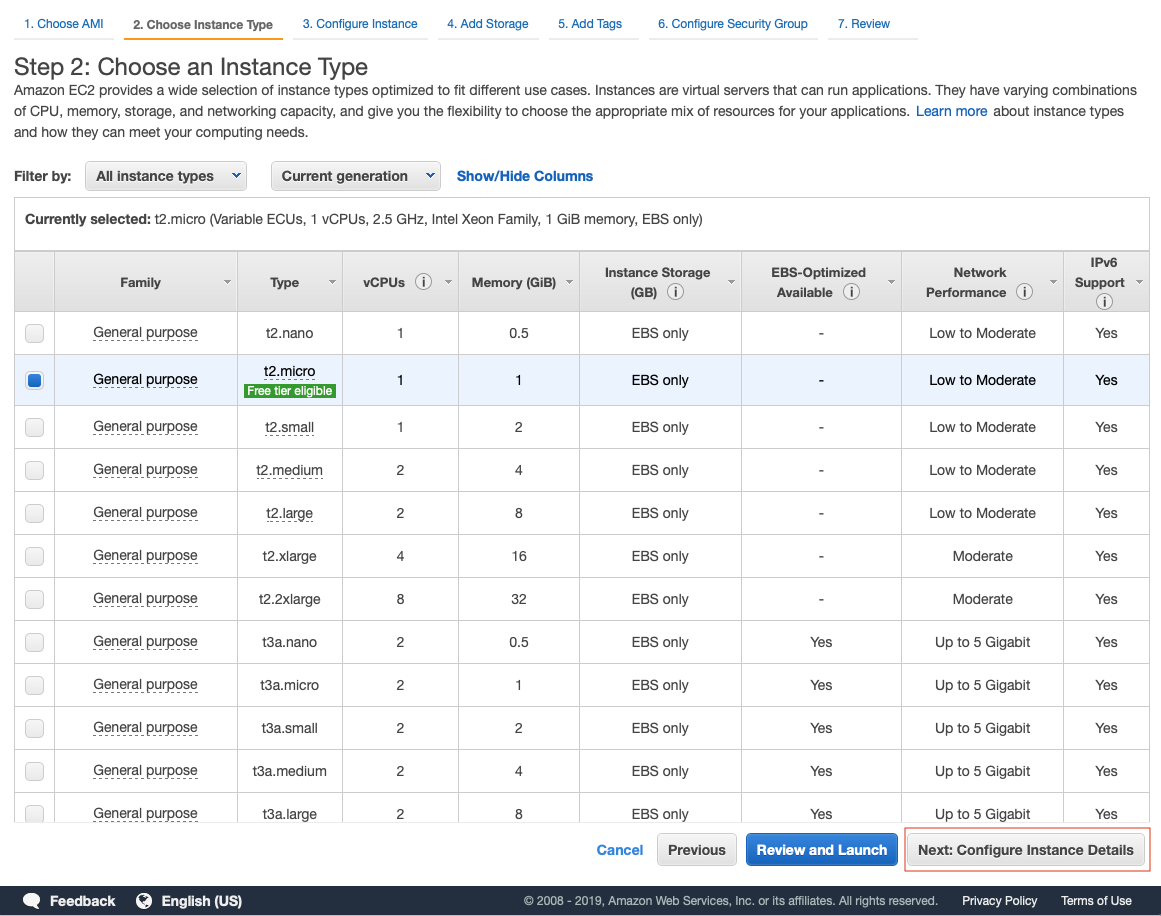
Step 2: Selecting Instance
To stay within the free tier, we will select the “General Purpose t2.micro” instance type. Click “Next: Configure Instance Details”
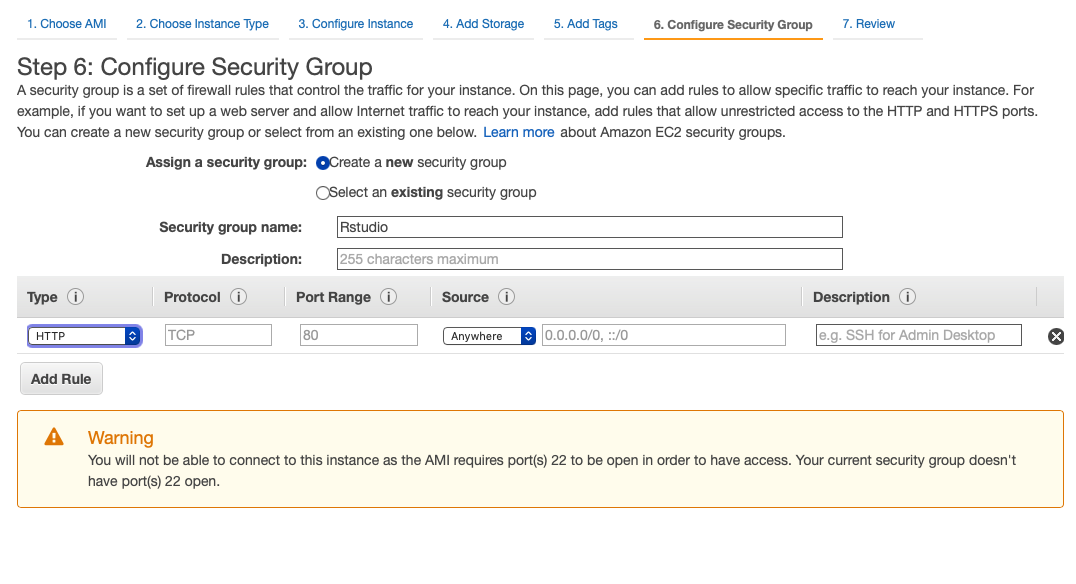
Step 4: Configuring the Security Group
A Security Group acts as a virtual firewall & controls traffic for one or more instances. Set your secuirty group name, which in this case I will name it “RStudio”. RStudio has a default port of 8787, but this AMI has it configured to port 80 (HTTP).
To give access to port 80 (HTTP) for our RStudio instance, we need to select HTTP under the “Type” drop-down and set the source to “Anywhere”. Click “Review and Launch”.
Warning: Setting your source to “Anywhere” opens your instance up to the world. Even though your instance is protected with SSH keys, it is susceptible to dictionary password attacks during boot. You can manage IP addresses within the Security Group, but that can become a handful if your continuously accessing your instance from different IP’s. Setting a reverse proxy for RStudio to reroute to port 443 on HTTPS is a better solution. Stay tuned for the next post on how to do this.
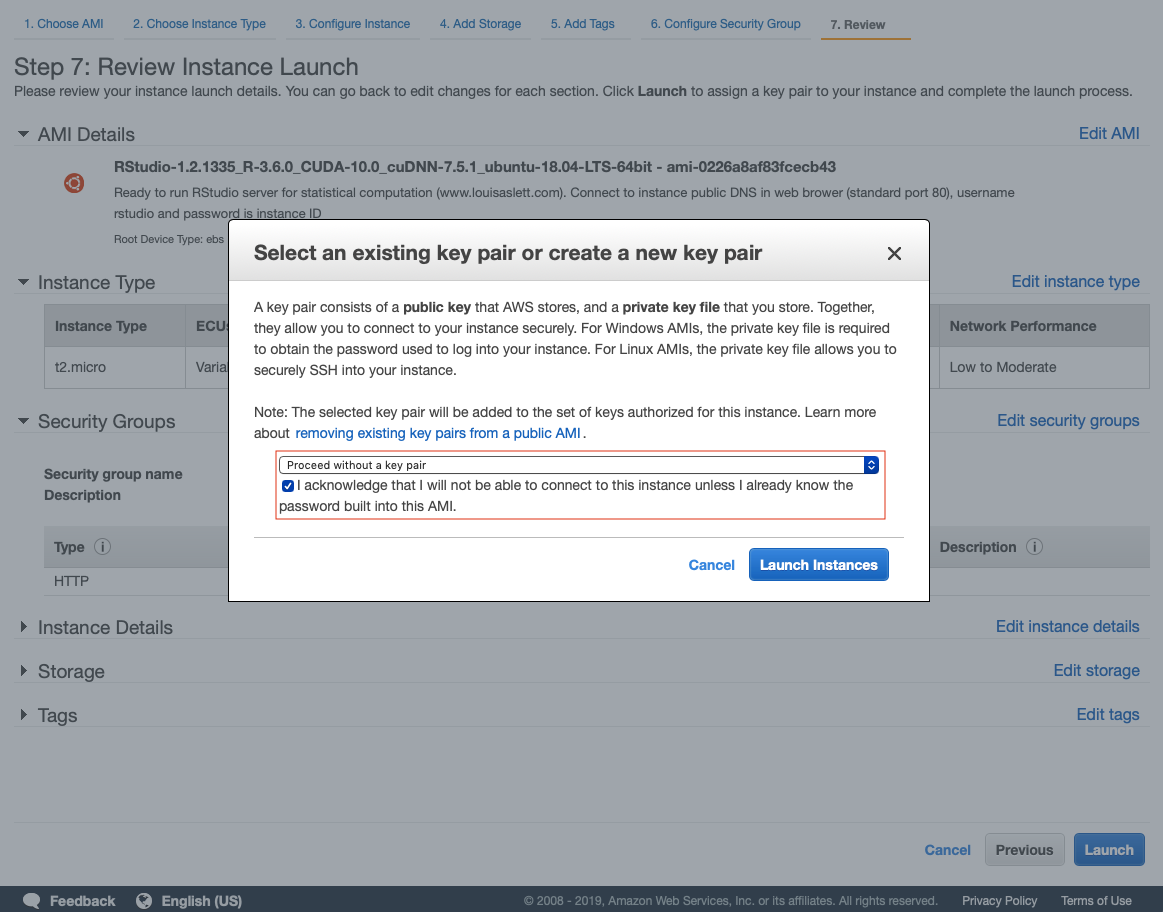
Step 5: Launching & Key-Pair
Click Launch and wait for the “Select an existing key pair or create a new key pair” tab to open. We will select “Proceed without a key pair” under the first drop-down and click the checkbox that states “I acknowledge that I will not be able to connect to this instance unless I already know the password built into this AMI”. Finally, click Launch Instances!
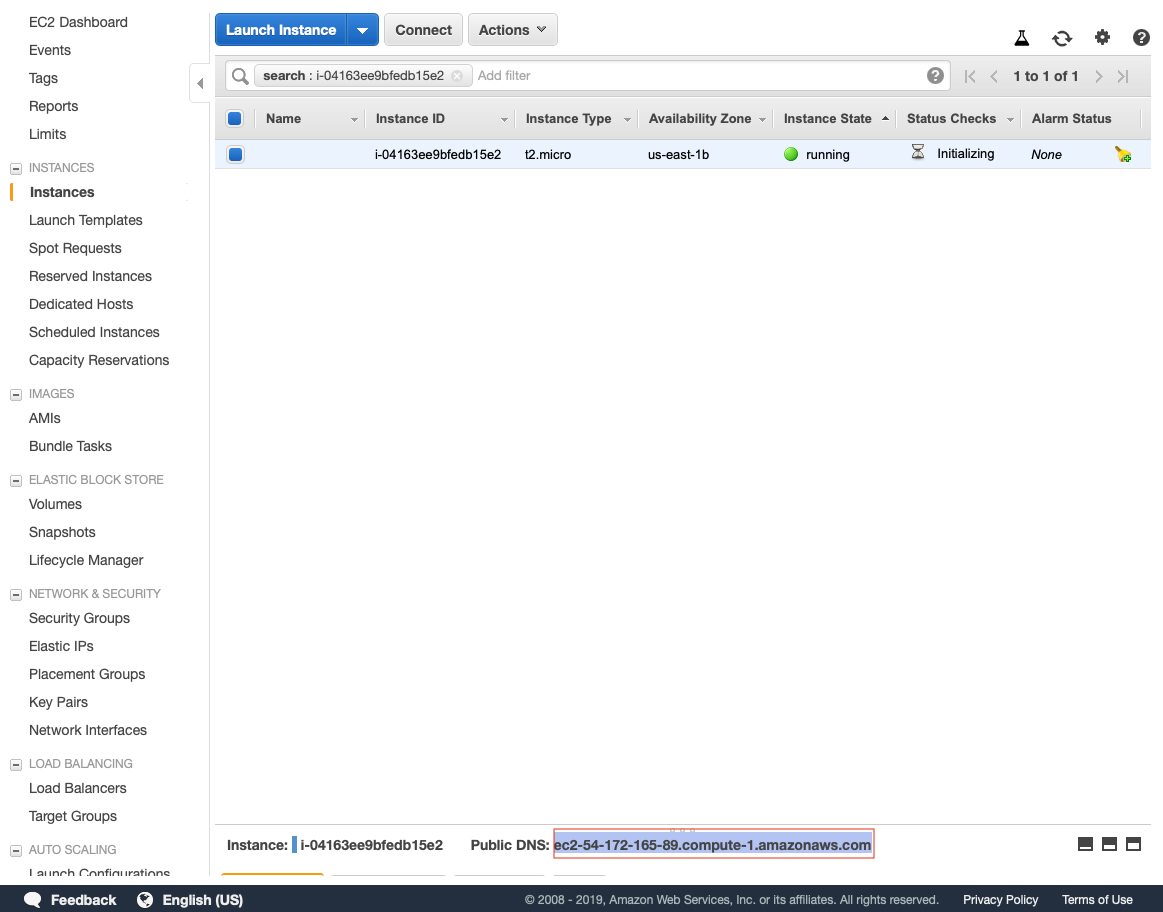
Step 6: Getting Public URL (DNS)
Once your instance State reads “running”, select the instance and copy the “Public DNS” to then paste into your browser url.

Logging in to RStudio
Once your browser connects to the instance, you’ll see an RStudio login screen. The AMI’s username is “rstudio” and the password is your instance’s ID (to the left of Public DNS).
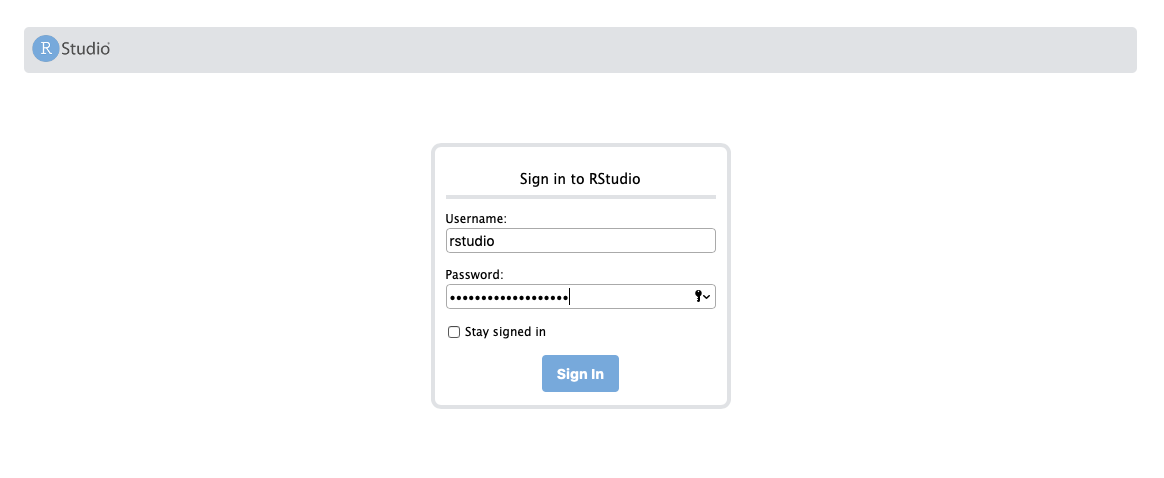
It is highly recommended to change your password as soon as you log in. See next step.
Step 7: Changing Password + Link Dropbox
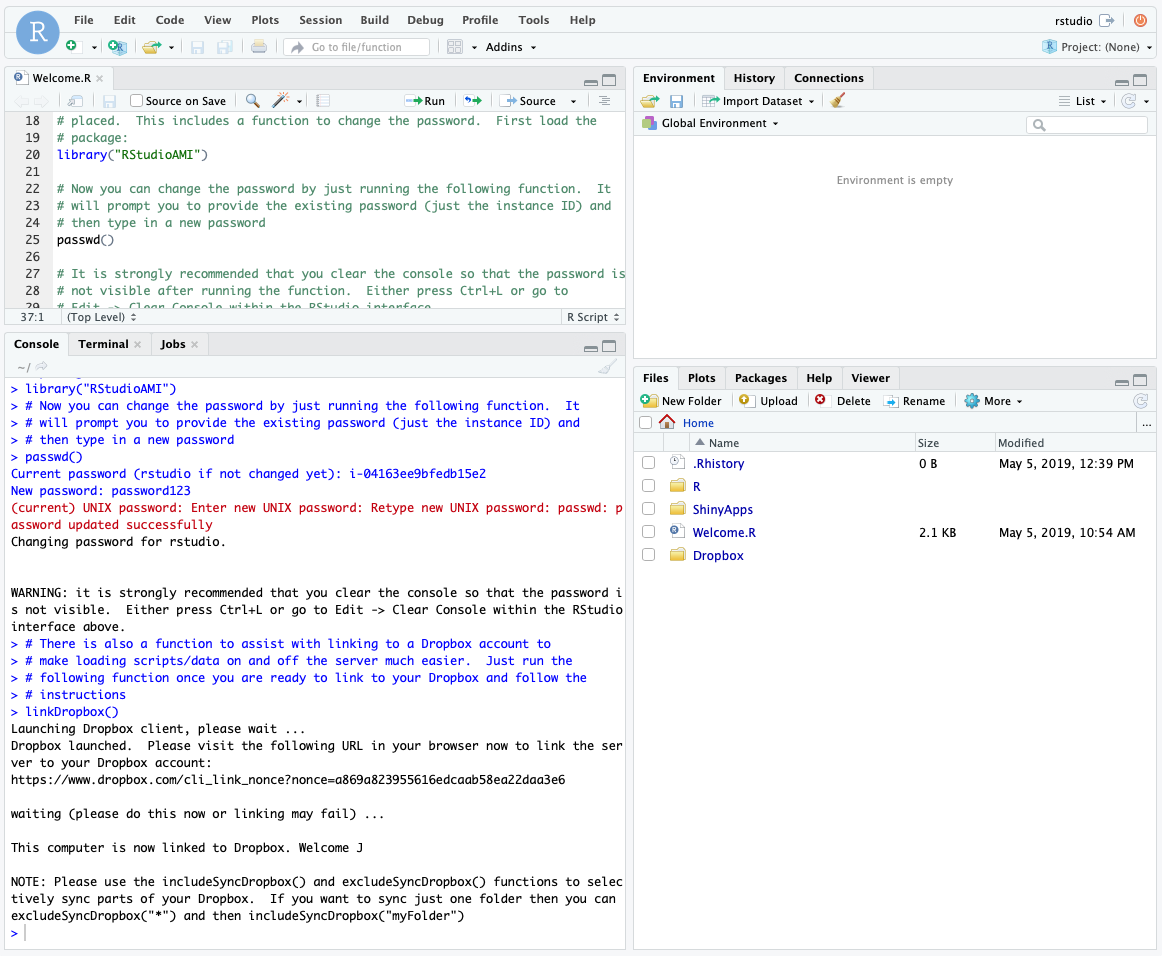
Success! I highly recommended reading everything in green that Louis Albert wrote, as it explains how to change your password and link to your dropbox. Luckily, it is very easy.
Quickly change your password
To change the password, load the “RStudioAMI” package by running library("RStudioAMI"). Then run passwd() which you’ll be prompted to enter the current password and your new password.
Detailed, Longer Way
Step 1: Choosing an AMI
You can choose the Amazon Linux AMI, which is provided at no additional cost and has a stable version of R in the repository. This AMI is maintained by AWS and includes packages and configurations that provide native integration with AWS and other software.
To go through the entire process, we will use the Ubuntu Server (18.04) AMI and download all the necessary software.

Step 2: Choosing an Instance Type
Choose an EC2 instance type that matches the data size and processing that your analysis requires. By default, R runs only on one core node and, in many cases, requires a lot of memory. For programming and development, the general-purpose T2 instance types are sufficient and cheap, and t2.micro is available through the AWS Free Tier.
For our purpose, we will select the “General Purpose T2.Micro” Instance. See the following link for more details on AWS EC2 Instance Types.
Step 3: Configuring Instance Details
We will leave these settings to default, but you can expand “Advanced Details” to add scripts like sudo apt update to run on instance start up. Click “Next: Add Storage” to continue.
Step 4: Add Storage
Here we can set the EBS volume size which defaults to 8GB. Usually, this will be enough, but let’s change it to 16GB to play it safe (free tier gets up to 30GB). Click “Next: Add Tags” to optionally add tags, then click “Next: Configure Security Group”.
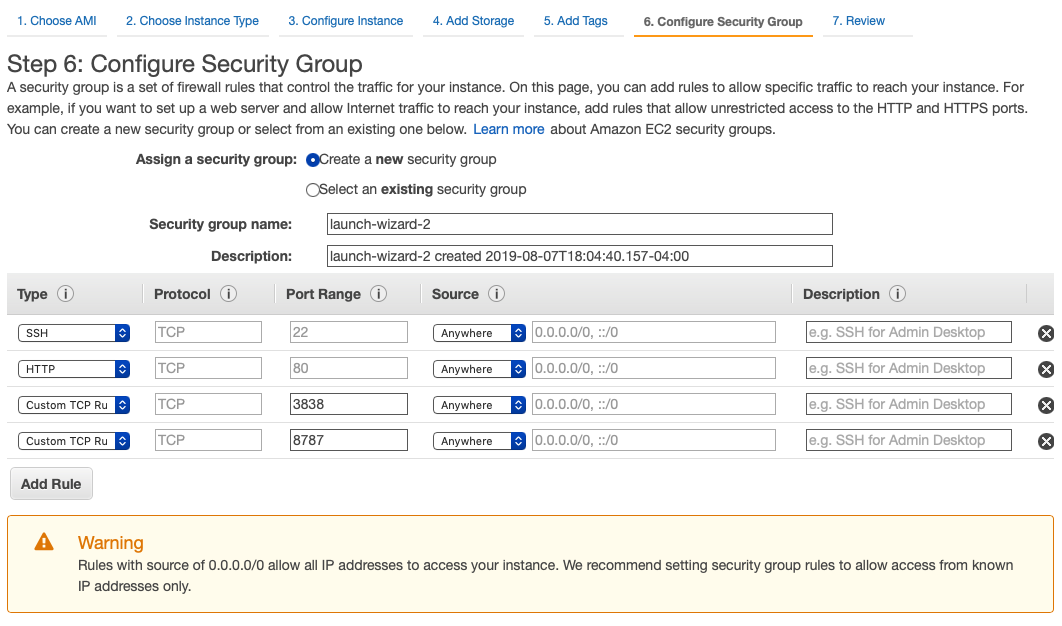
Step 5: Configuring the Security Group
In the EC2 launch wizard, you define a security group, which acts as a virtual firewall that controls the traffic for one or more instances. For this R-based analysis environment, we want to access RStudio from the browser so select HTTP from the Type dropdown, and set the Source settings to “Anywhere”.
We will add an additional rule to allow SSH logins to our instance directly. Select SSH under type and set Source to “Anywhere”. Next, we want to add the ports for Shiny-server and RStudio-server so lets add two custom TCP rules and set the ports to 3838 and 8787 respectively. Set both sources to “Anywhere”. See below for review.
- SSH: port 22
- HTTP: port 80
- Shiny: port 3838
- RStudio: port 8787
As a quick reminder about SG source settings;
Warning: Setting your source to “Anywhere” opens your instance up to the world. Even though your instance is protected with SSH keys, it is susceptible to dictionary password attacks during boot. You can manage IP addresses within the Security Group, but that can become a handful if your continuously accessing your instance from different IP’s. Setting a reverse proxy for RStudio to reroute to port 443 on HTTPS is a better solution. Stay tuned for the next post on how to do this.
After you finish your security group configuration, choose “Review and Launch”.
Step 6: Launch & Key Pair Management
Review your instance information and click “Launch”. You’ll be prompted to “Select or Create Key Pair” and choose “Create a new key pair” and name it to your choosing. Launch your instance and let’s change some permissions to the key-pair while it launches. Open your terminal and copy / paste the below.
mv <path-to-pem-file> ~/.ssh
chmod 600 <new-path-to-pem-file>
Once the instance status is “running”, we can now login via SSH.
Step 7: SSH login to our EC2 to begin downloading software
We will connect to the EC2 instance via SSH on the terminal. Please open your terminal and copy/paste the below, and replace the content inside < > with your instance info.
ssh -i <path-to-pem-file> ubuntu@<PublicDNS>
When your prompted, type yes.
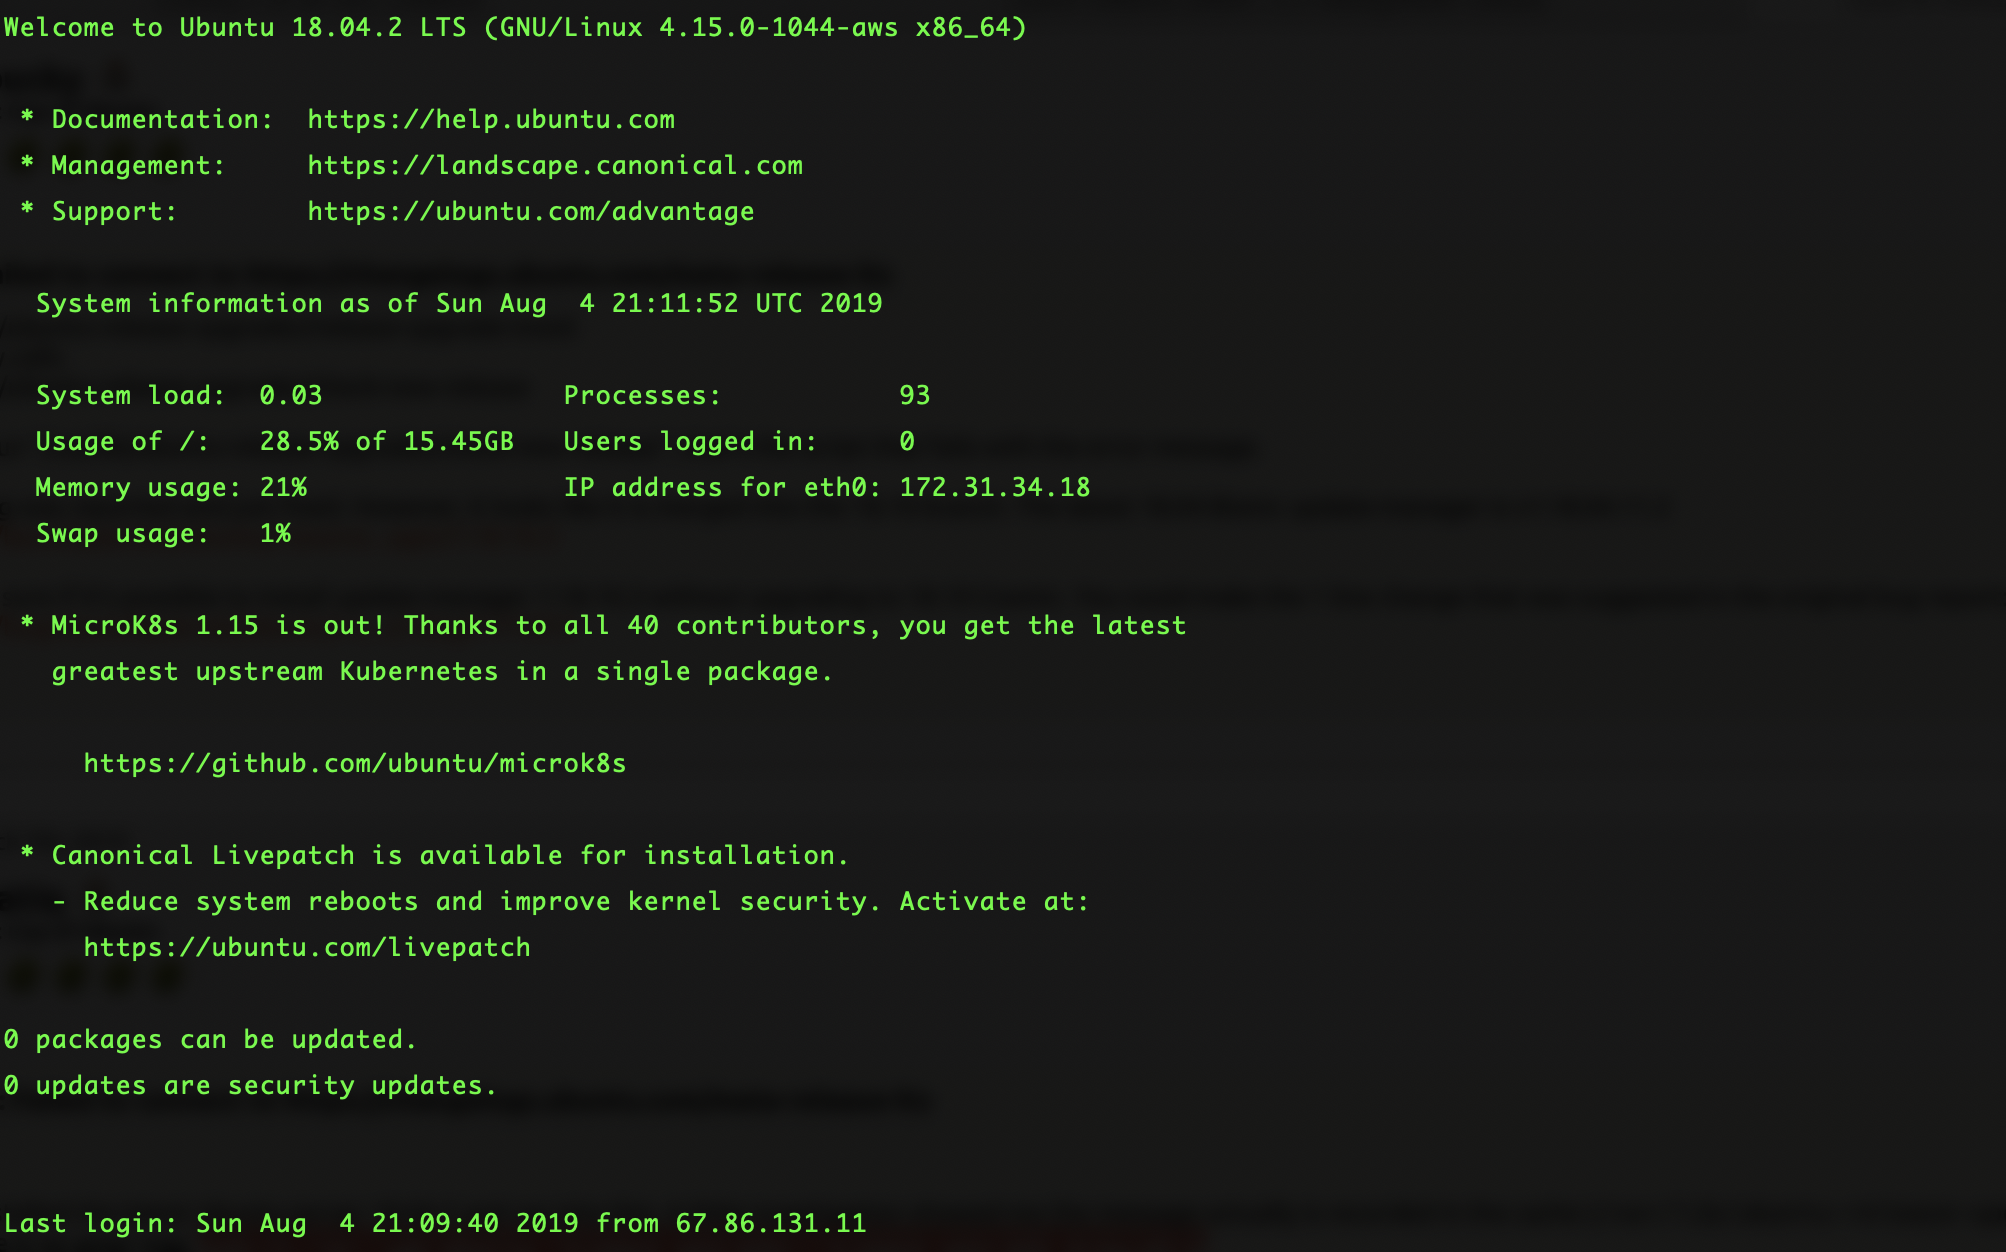
Success! We are finally logged into our AWS EC2 instance. Before I get into the script of downloading the necessary software, I want to show how to create swap memory to stay within free tier instances.
Step 8: Creating Swap Memory and Why Its Necessary
Due to the limited RAM in the free tier T2.micro instance, we need to enable and create swap memory to successfully download certain packages without clogging the RAM (and to avoid having to select a larger instance outside of free-tier). If you plan on using instances above t2.medium, then you do not need to do this and skip to step 9.
Some R packages like Tidyverse require memory larger than 1GB to successfully download, so that’s when Swap memory will allow us to get the extra memory needed. In simple terms, Swap memory “borrows” some memory from the disk when the RAM is fully utilized and clogged. Please copy and paste the below to set 2GB of swap memory (do not set swap > 2x larger than RAM).
#Create Swap file memory to avoid using bigger instance
sudo /bin/dd if=/dev/zero of=/var/swap.1 bs=1M count=2048
sudo /sbin/mkswap /var/swap.1
sudo /sbin/swapon /var/swap.1
sudo sh -c 'echo "/var/swap.1 swap swap defaults 0 0 " >> /etc/fstab'
Step 9: Downloading R, RStudio, and System Dependencies
Now it is time to download all of the necessary software, libraries, packages, etc. It is important to select the most recent versions of RStudio where you can find here. Modify the script to install the most recent version if the one used below is outdated. Copy / paste the below in your terminal.
# The Ubuntu repos contain an outdated version of R so lets add the updated repo to avoid errors
sudo apt-key adv --keyserver keyserver.ubuntu.com --recv-keys E298A3A825C0D65DFD57CBB651716619E084DAB9

sudo add-apt-repository 'deb https://cloud.r-project.org/bin/linux/ubuntu bionic-cran35/'

# Update ubuntu package repo, to get latest R
sudo apt update

# Install R
sudo apt -y install r-base r-base-dev

# Install shiny before shiny-server
sudo R -e "install.packages('shiny')"

# Install debian package manager, gdebi
sudo apt install gdebi-core


# Install Shiny Server
wget https://download3.rstudio.org/ubuntu-14.04/x86_64/shiny-server-1.5.9.923-amd64.deb
sudo gdebi -n shiny-server-1.5.9.923-amd64.deb
sudo rm shiny-server-1.5.9.923-amd64.deb

# Dependencies for R packages like RMariaDB, devtools, tidyverse, sparklyr. Please run seperate.
sudo apt -y install libcurl4-openssl-dev

sudo apt -y install libssl-dev libxml2-dev libmariadbclient-dev build-essential libcurl4-gnutls-dev


# Install RStudio
wget https://download2.rstudio.org/server/bionic/amd64/rstudio-server-1.2.1335-amd64.deb
sudo gdebi -n rstudio-server-1.2.1335-amd64.deb
sudo rm rstudio-server-1.2.1335-amd64.deb
Running R & Installing Packages
Now let’s put that swap memory to use! Let’s install some useful packages, including some of the larger packages that would give us issues if the swap memory isn’t set. It may take a while for some packages like “tidyverse”.
# Install some useful R Packages (be a little patient here)
sudo R -e "install.packages('RCurl', repos='http://cran.rstudio.com')"
sudo R -e "install.packages('devtools', repos='http://cran.rstudio.com')"
sudo R -e "install.packages('tidyverse')"
sudo R -e "install.packages('RMariaDB')"
Setting RStudio login credentials
Now let’s quickly add the RStudio user credentials and install Java to ensure RStudio has all the necessary libraries to work properly.
# Add user info to login RStudio
sudo adduser rstudio

#Add rstudio to sudo group
sudo usermod -aG sudo rstudio
Install Java
Install Java for RStudio and reconfigure the library paths
# Install Java and reconfigure in R for RStudio use
sudo apt -y install default-jdk
sudo R CMD javareconf


# Change permissions for R library
sudo chmod 777 -R /usr/local/lib/R/site-library
Ports for RStudio + Shiny
Finally, lets decide if we want to change the port for RStudio or not. If we plan on running a Shiny App on this instance, then I will want to leave RStudio on port 8787 and run shiny on port 80.
As a reminder, port 80 is the default internet port which enables users to use; http://domain.com instead of http://domain.com:8787.
I will show how to install and use nginx in order to run both Shiny & RStudio on port 80 in a future post.
For this post, I am going to leave RStudio on port 8787 but the command to switch it to port 80 is below (or simply just open and edit the .conf file). I am going to leave it on port 8787 because in a future post, nginx will be able to route ports like 8787 and 3838 to port 80.
# ****VERY IMPORTANT***
#If you plan on running a shiny app on port 80, then you need to set a reverse proxy to use one port for both.
sudo echo "www-port=80" >> /etc/rstudio/rserver.conf

#Restart rstudio-server to incorporate changes made in rserver.conf
sudo rstudio-server restart
Great, so everything is now downloaded onto our EC2 that is required to login to RStudio from our browser. For those of you who did the short way first, I am sure you now understand why I called this the “Detailed, longer way” and if you haven’t then go ahead and try the short and easy way.
Step 10: Logging into RStudio + Viewing Shiny
Open a web browser and enter your Public DNS(IPv4) as part of the URL to login to RStudio Server. If you kept RStudio on port 8787 (which I did in this post), then add :8787 to the end of your url like below. This means that the shiny-server we also downloaded is living on its default port, 3838. We will also visit there.
RStudio
For login credentials, use the newly created credentials for the user rstudio.

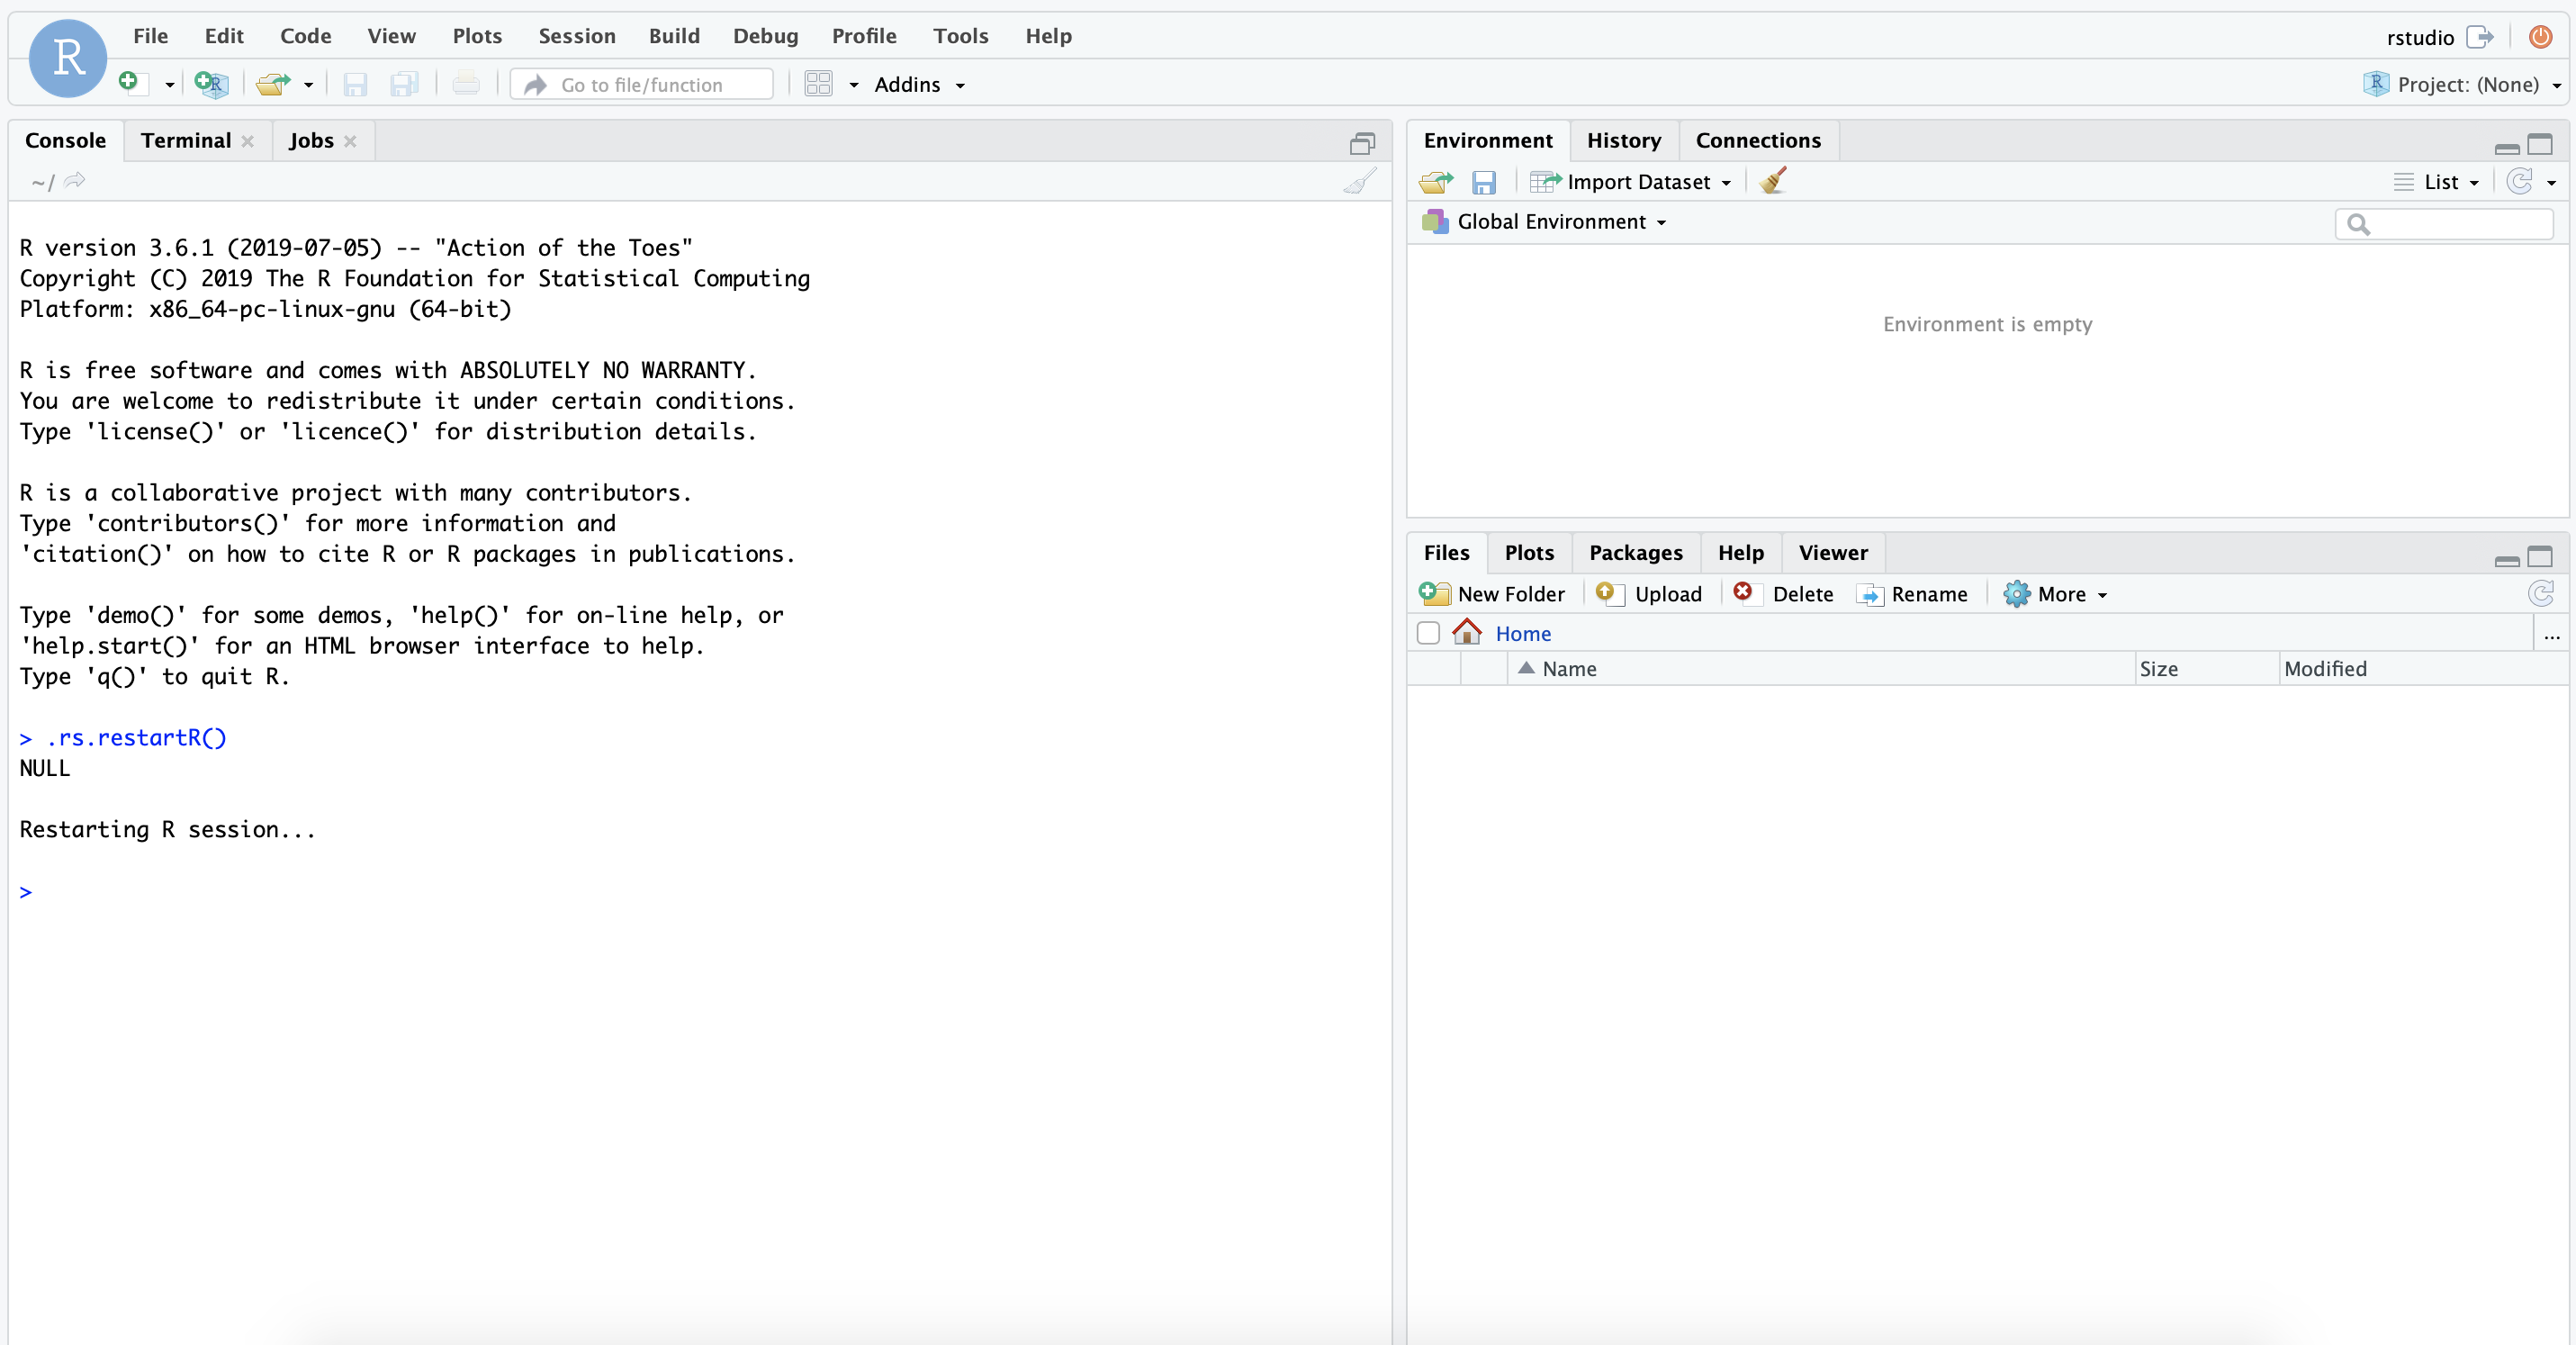
RStudio seems to be happy at home! How about Shiny?
Shiny

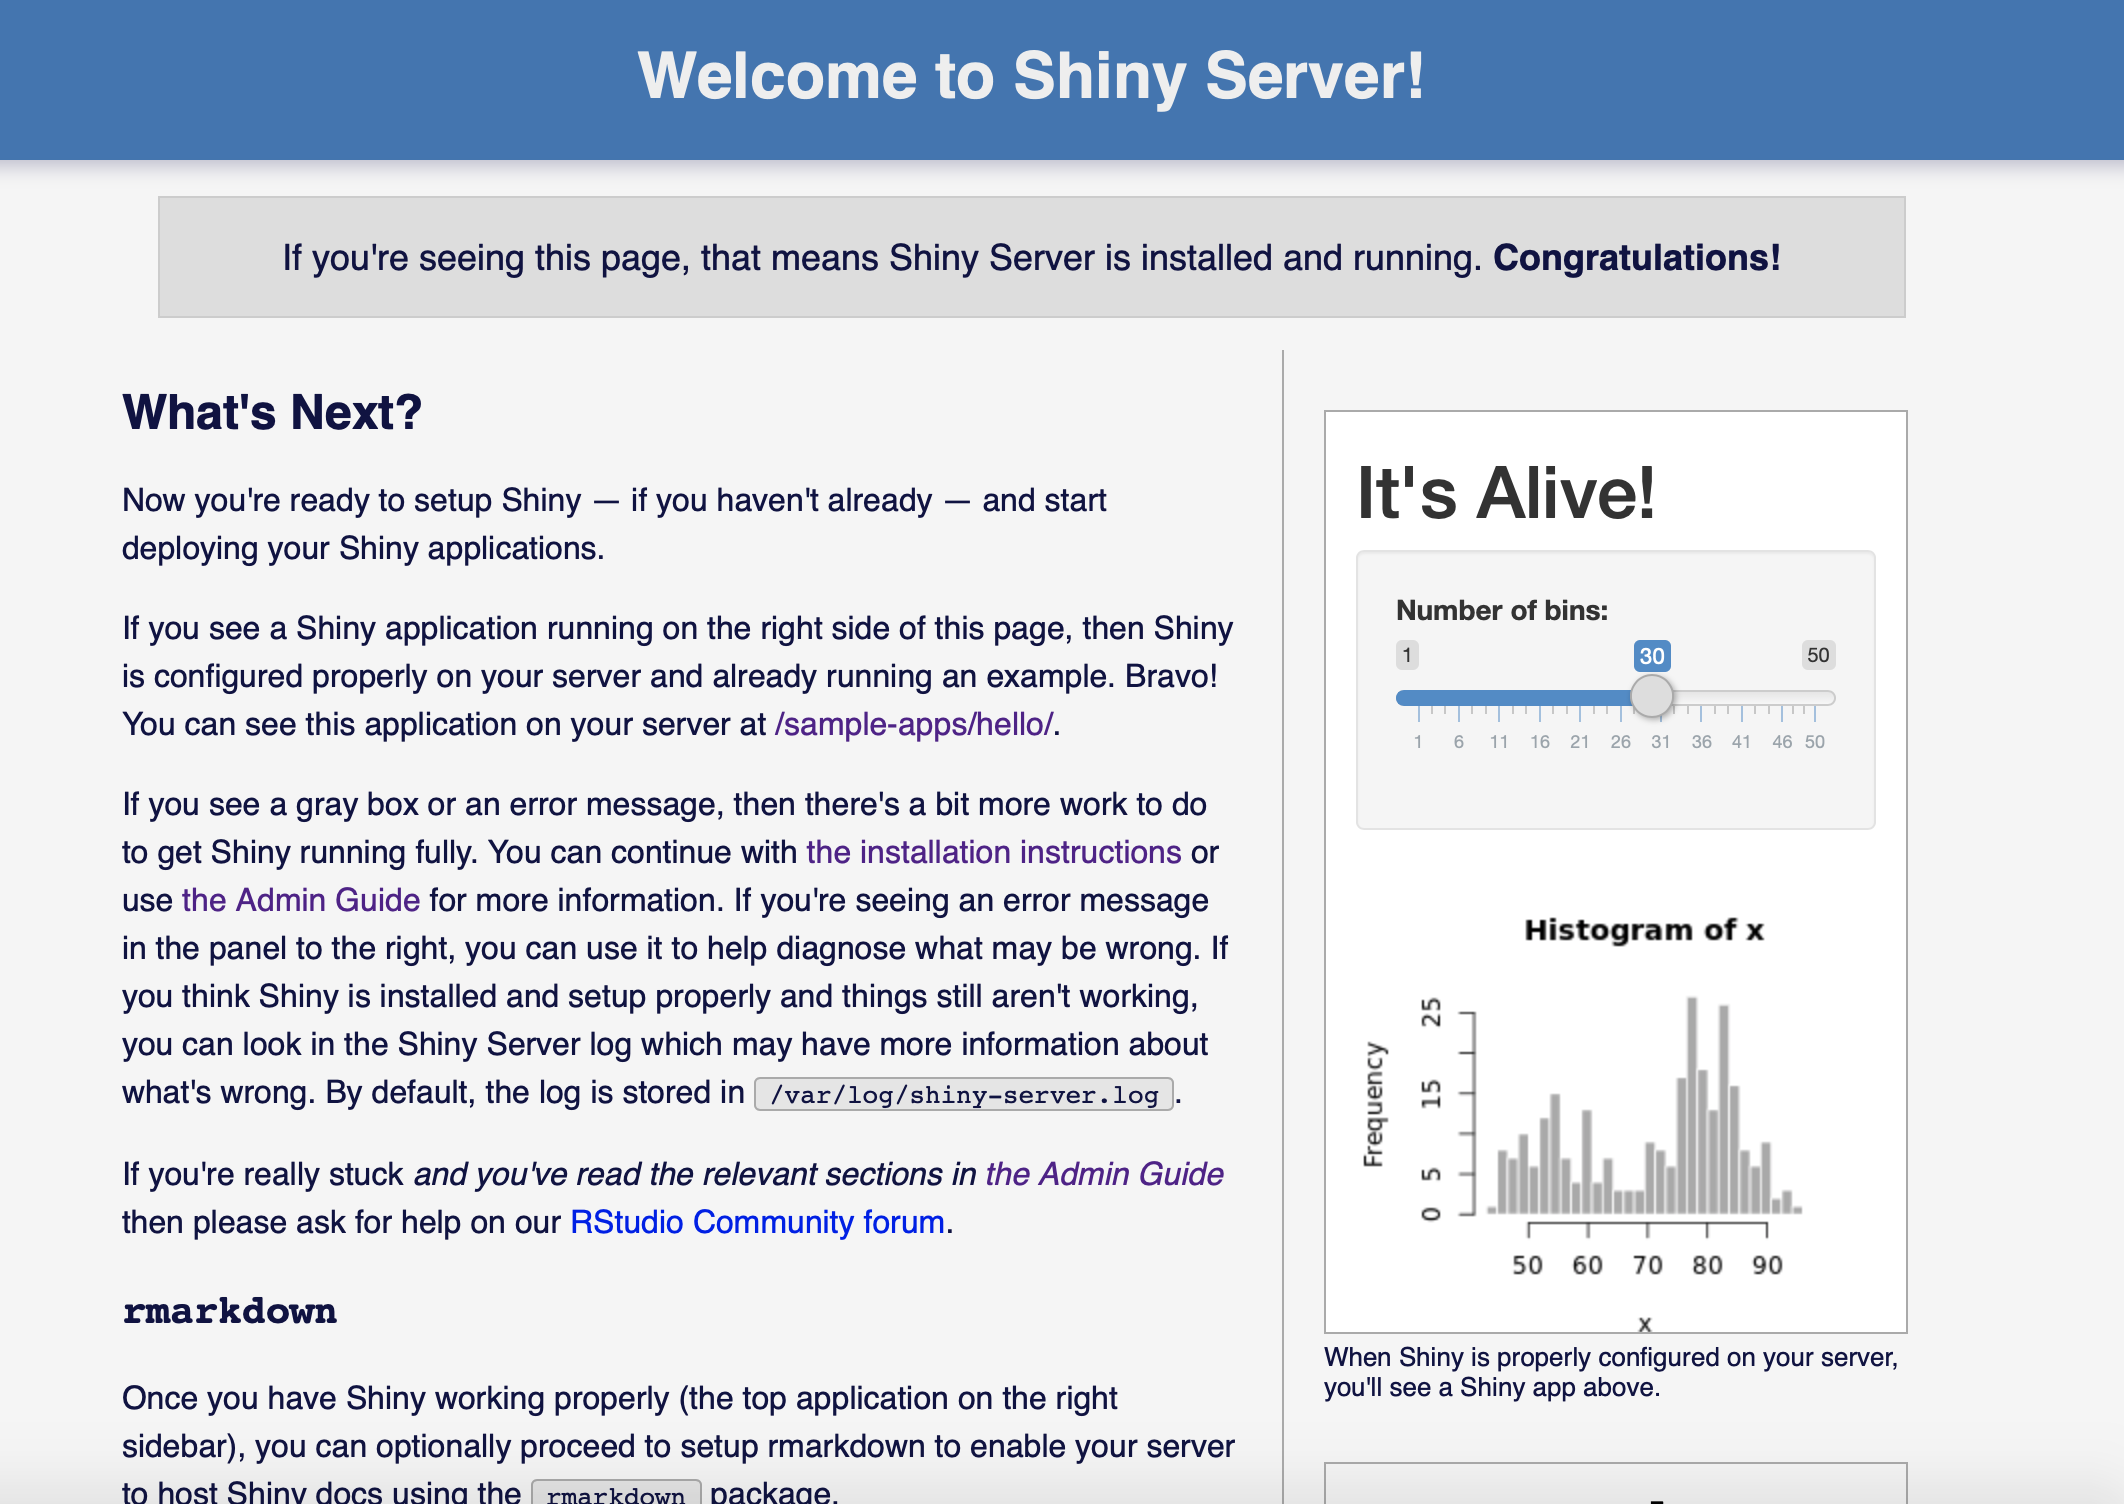
Both RStudio and Shiny are deployed to their default ports! In an upcoming post, I will show how we can host both RStudio & Shiny on port 80 using nginx. Now we can do our data analysis on any browser, anywhere, at any scale. AWS brings us a new beneficial way to use RStudio!
Optional Steps
Step 11: Installing and Using MySQL in RStudio’s Terminal
One of my favorite things in RStudio is the built-in system terminal that allows us to install/use MySQL without ever leaving RStudio. We can access/create databases, tables, etc all within our RStudio session from anywhere. Click the terminal tab and copy/paste the below to install/use MySQL in RStudio:
# Install MySQL
wget https://dev.mysql.com/get/mysql-apt-config_0.8.12-1_all.deb
sudo gdebi -n mysql-apt-config_0.8.12-1_all.deb

#To be sure everything is up to date
sudo apt update
sudo apt upgrade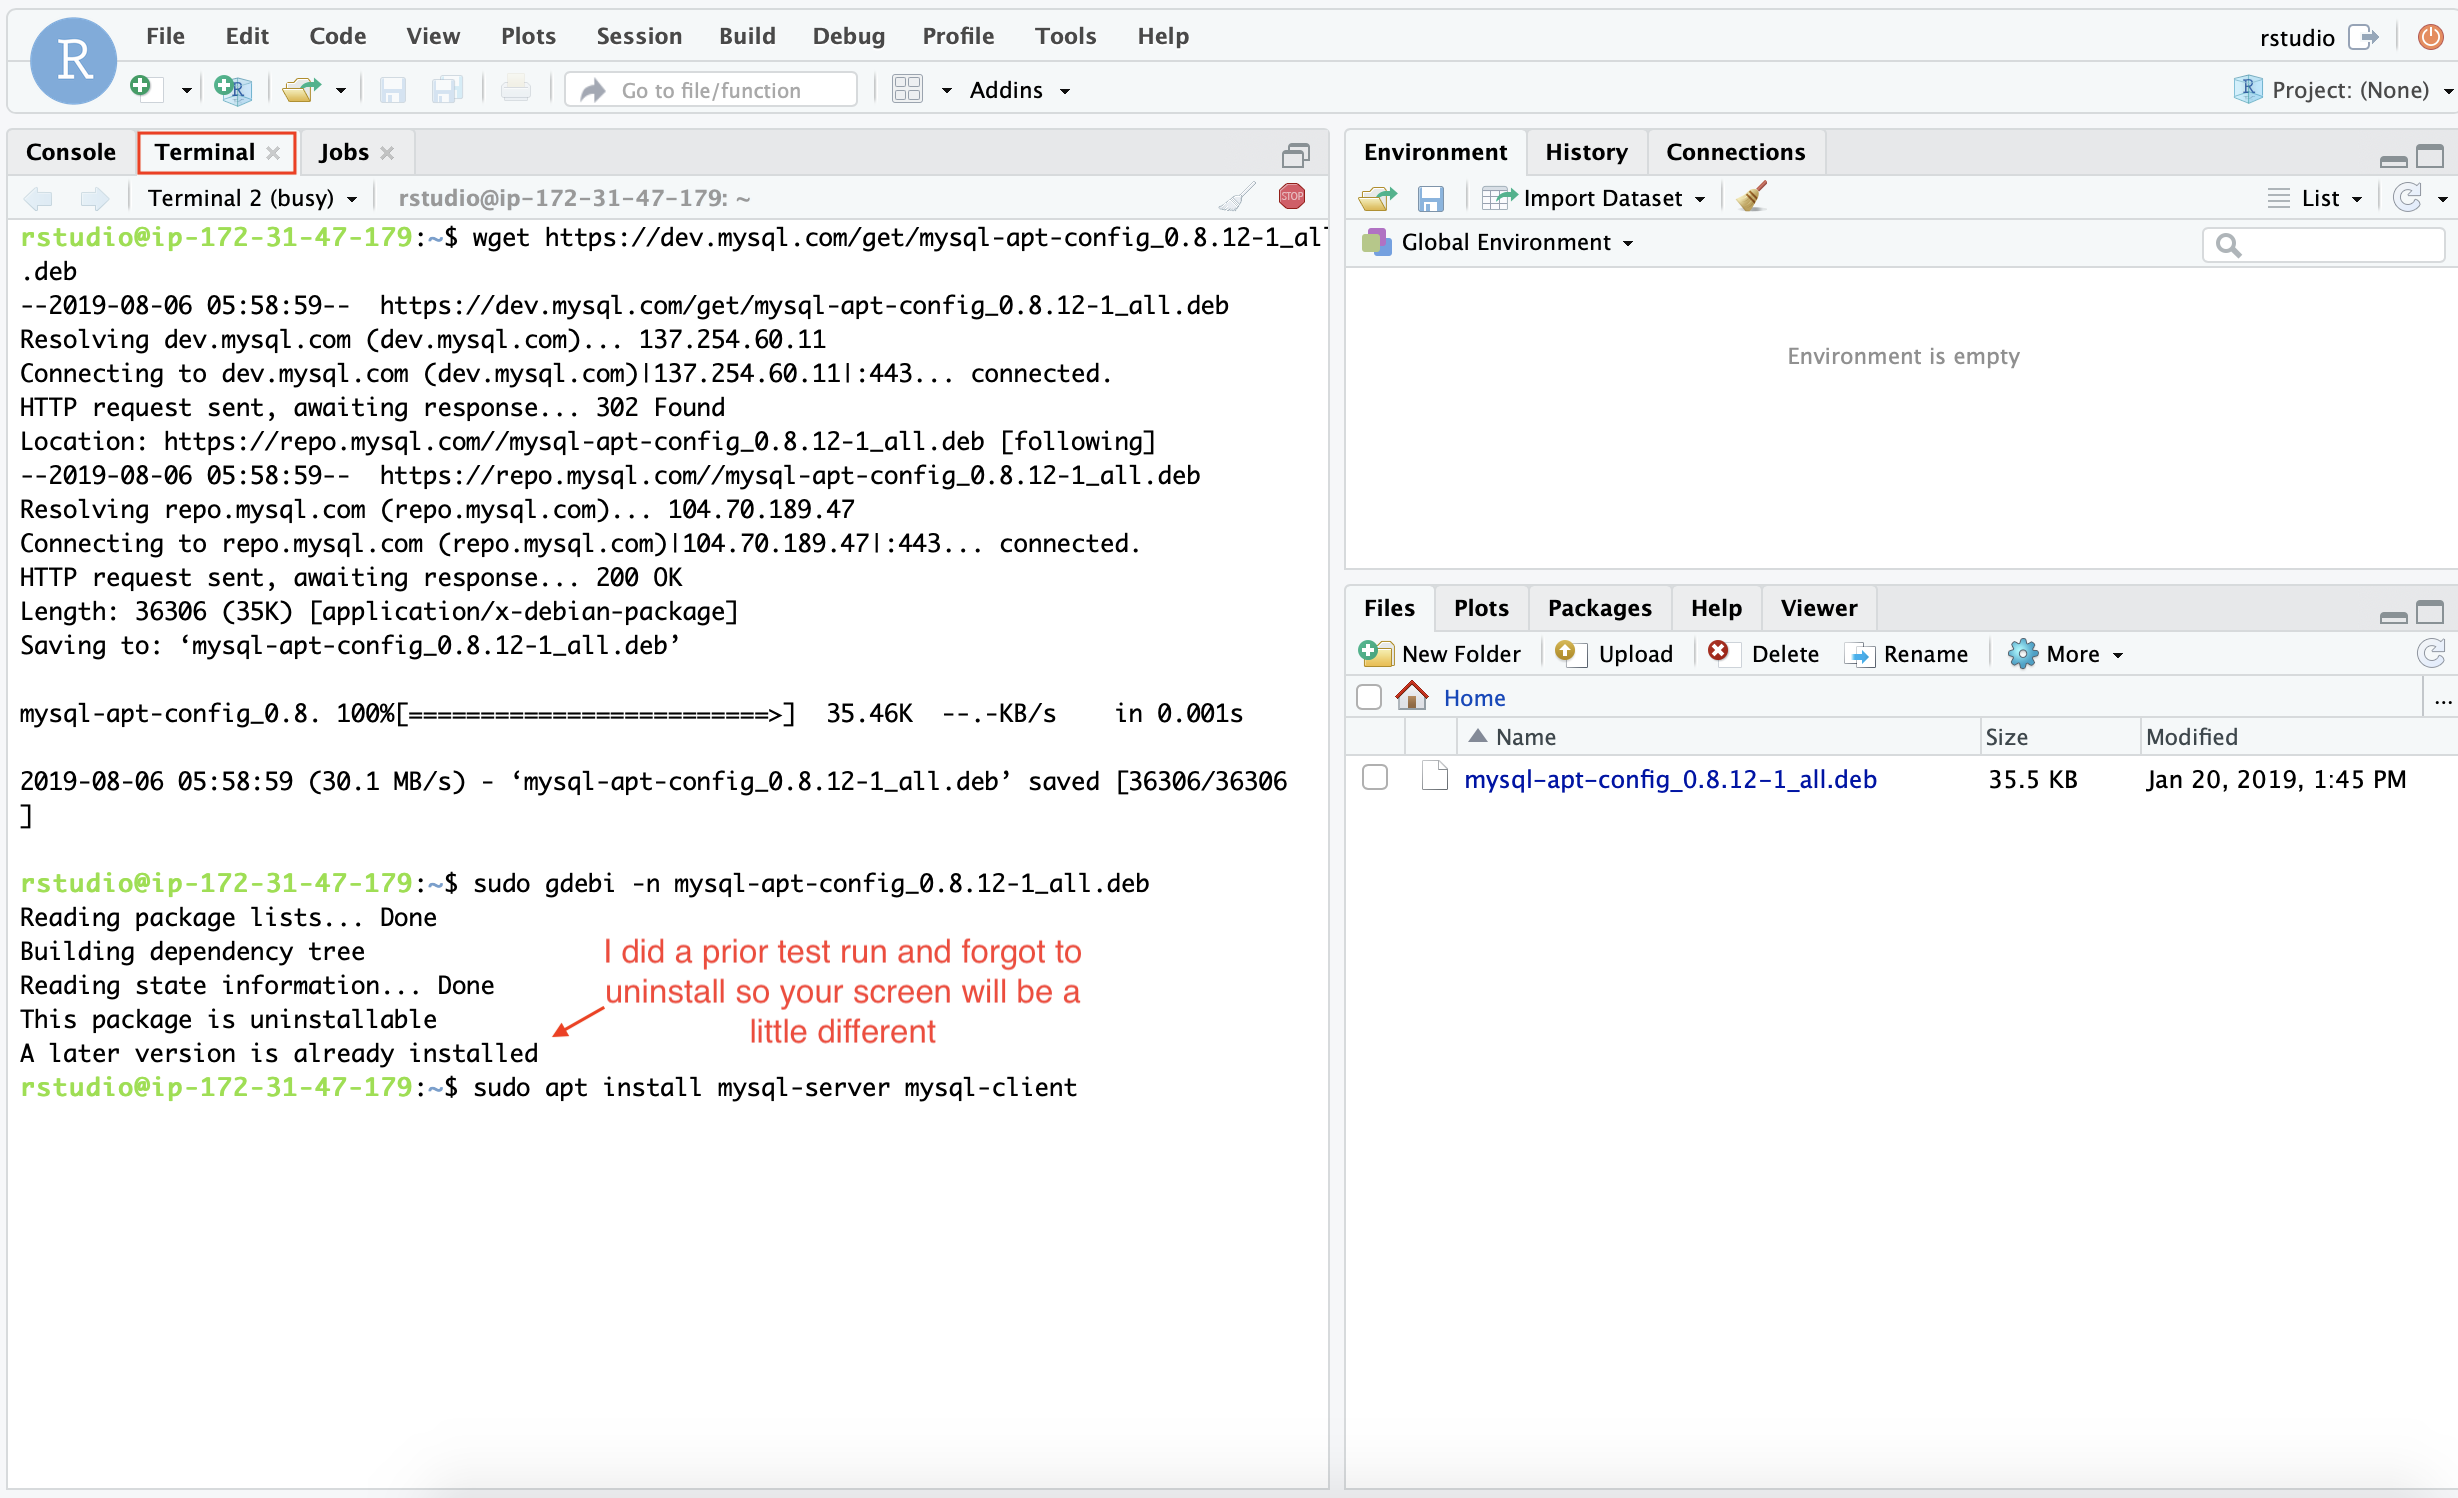
I included the update/upgrade script in the above to ensure your installing the most up-to-date version of mysql, but this is optional.
Now install mysql-server and when prompted for a password, please create one and remember it for when you login to your mysql-server.
# Create your password
sudo apt install mysql-server mysql-client
sudo rm mysql-apt-config_0.8.12-1_all.deb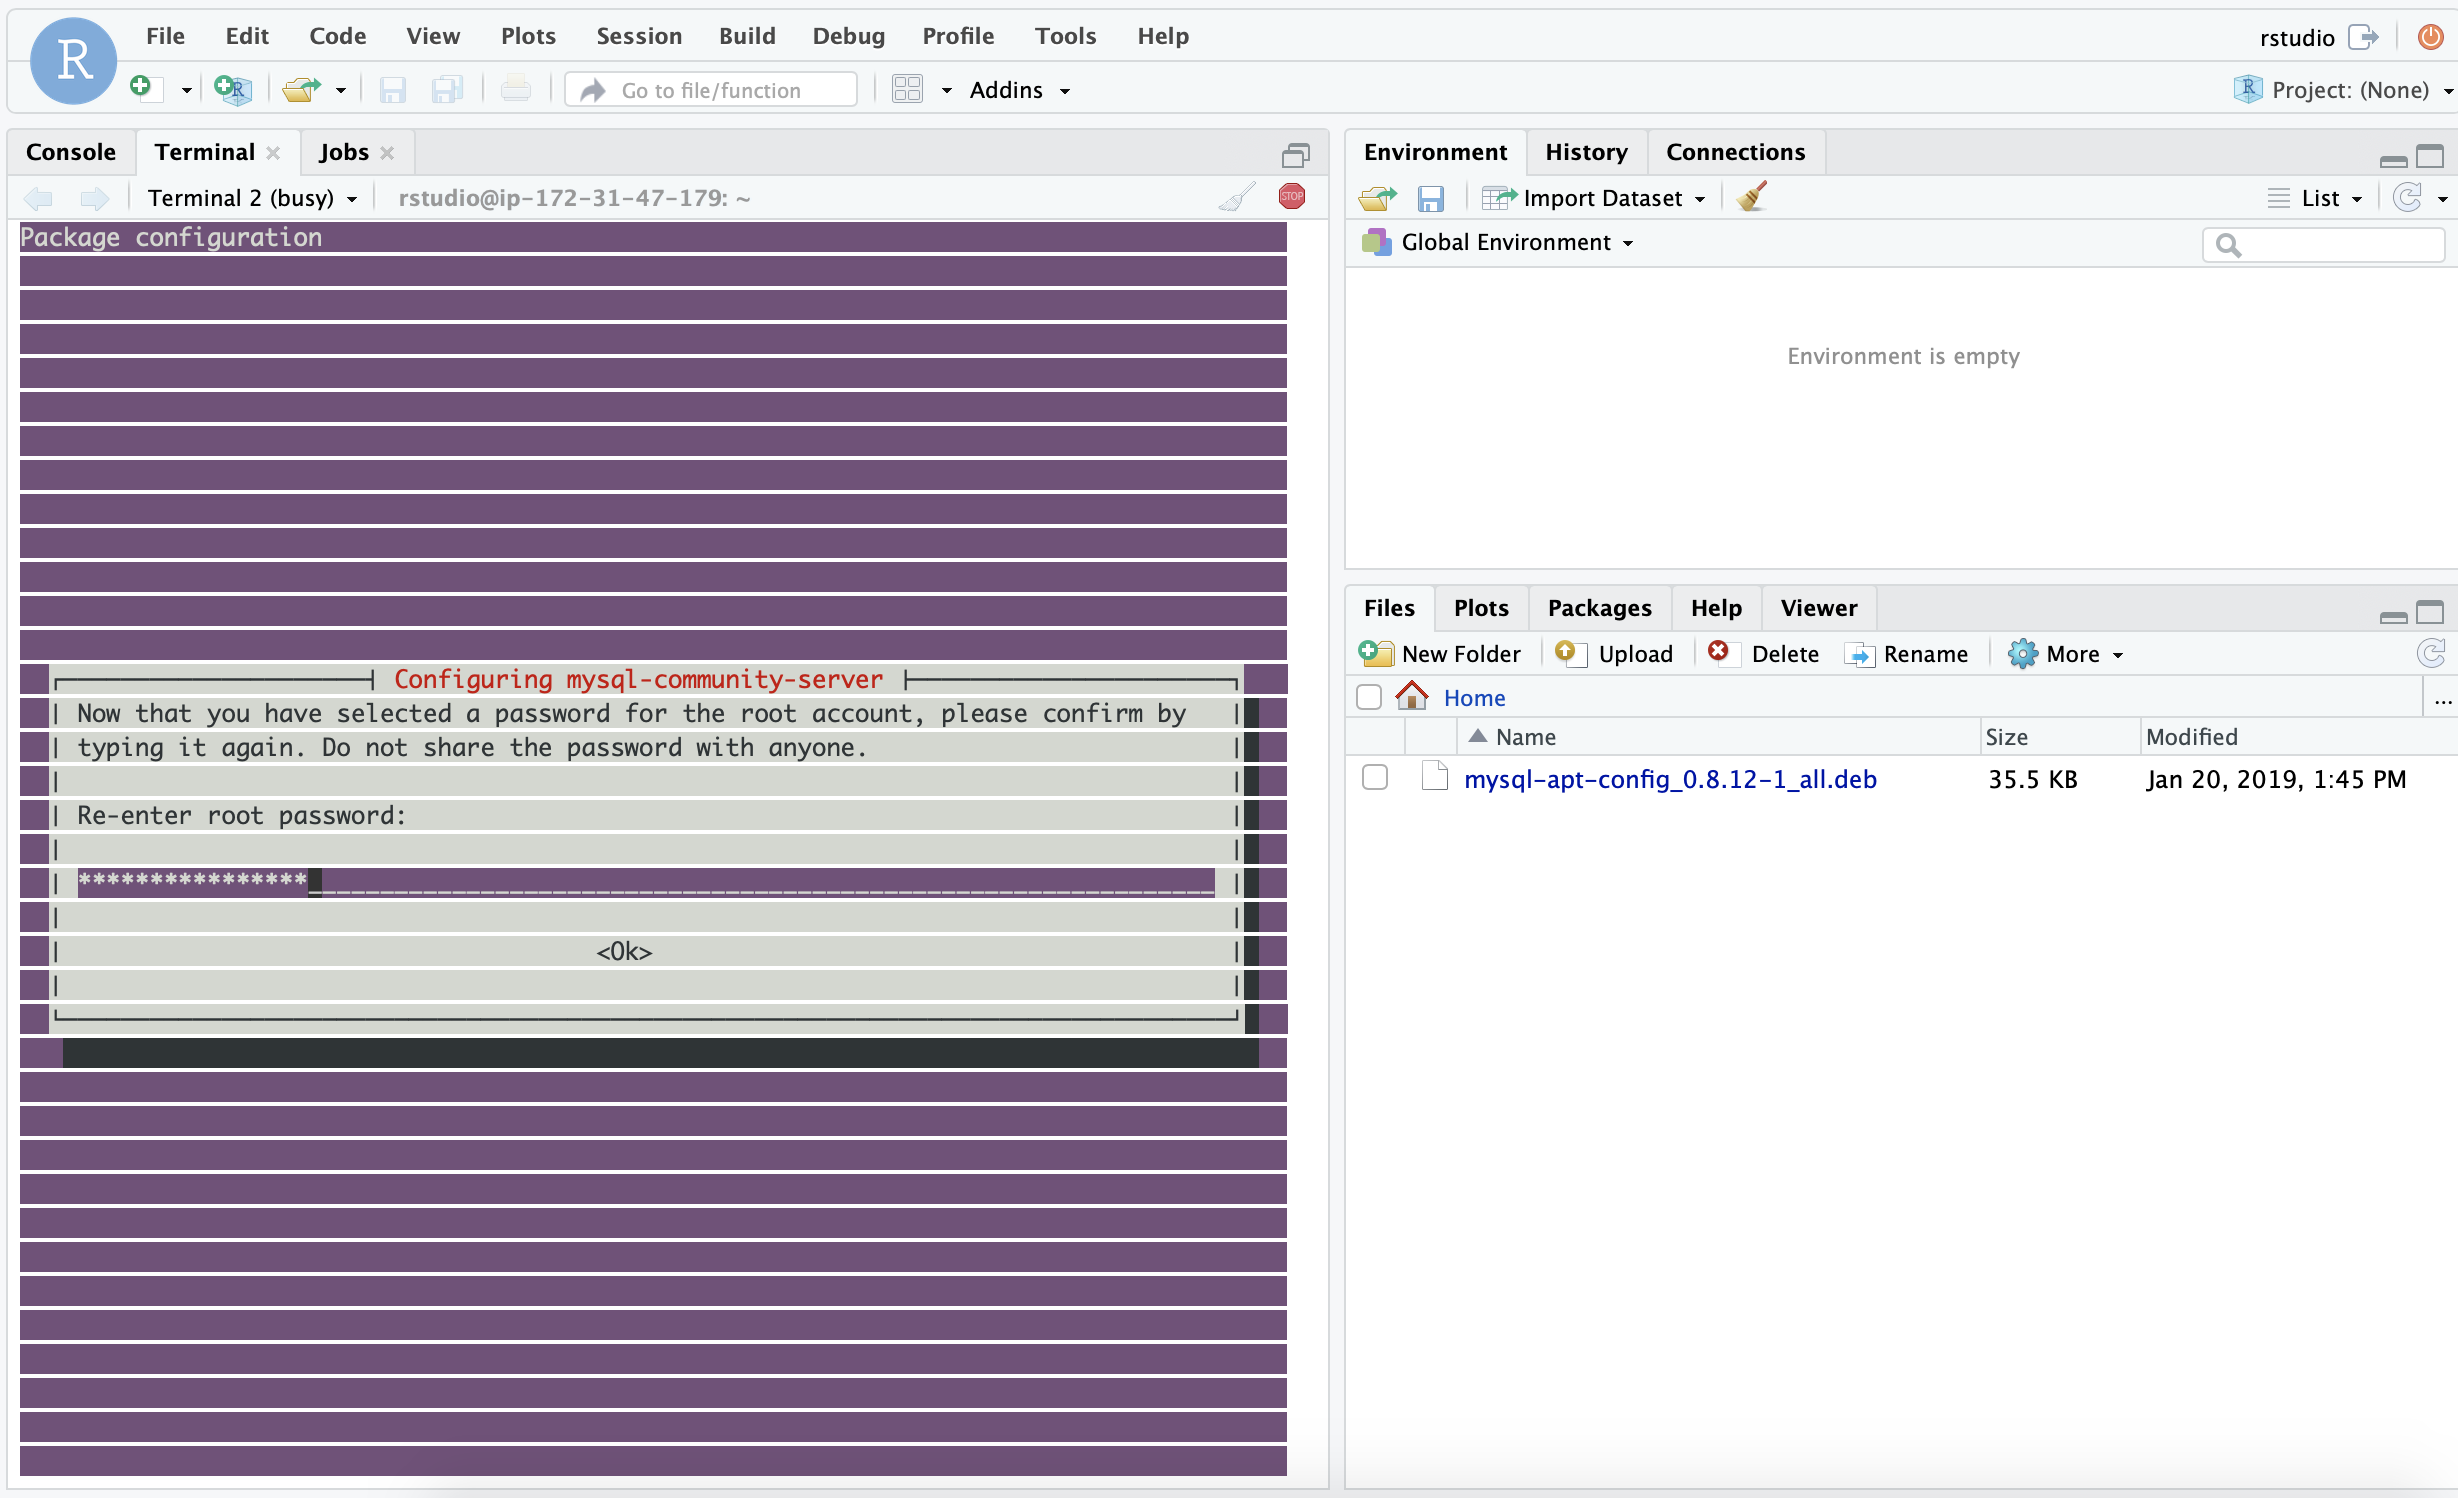
Now login with the password we created to see that everything went well!
# Login to MySQL inside RStudi Terminal
sudo mysql -p

#It works!
exit;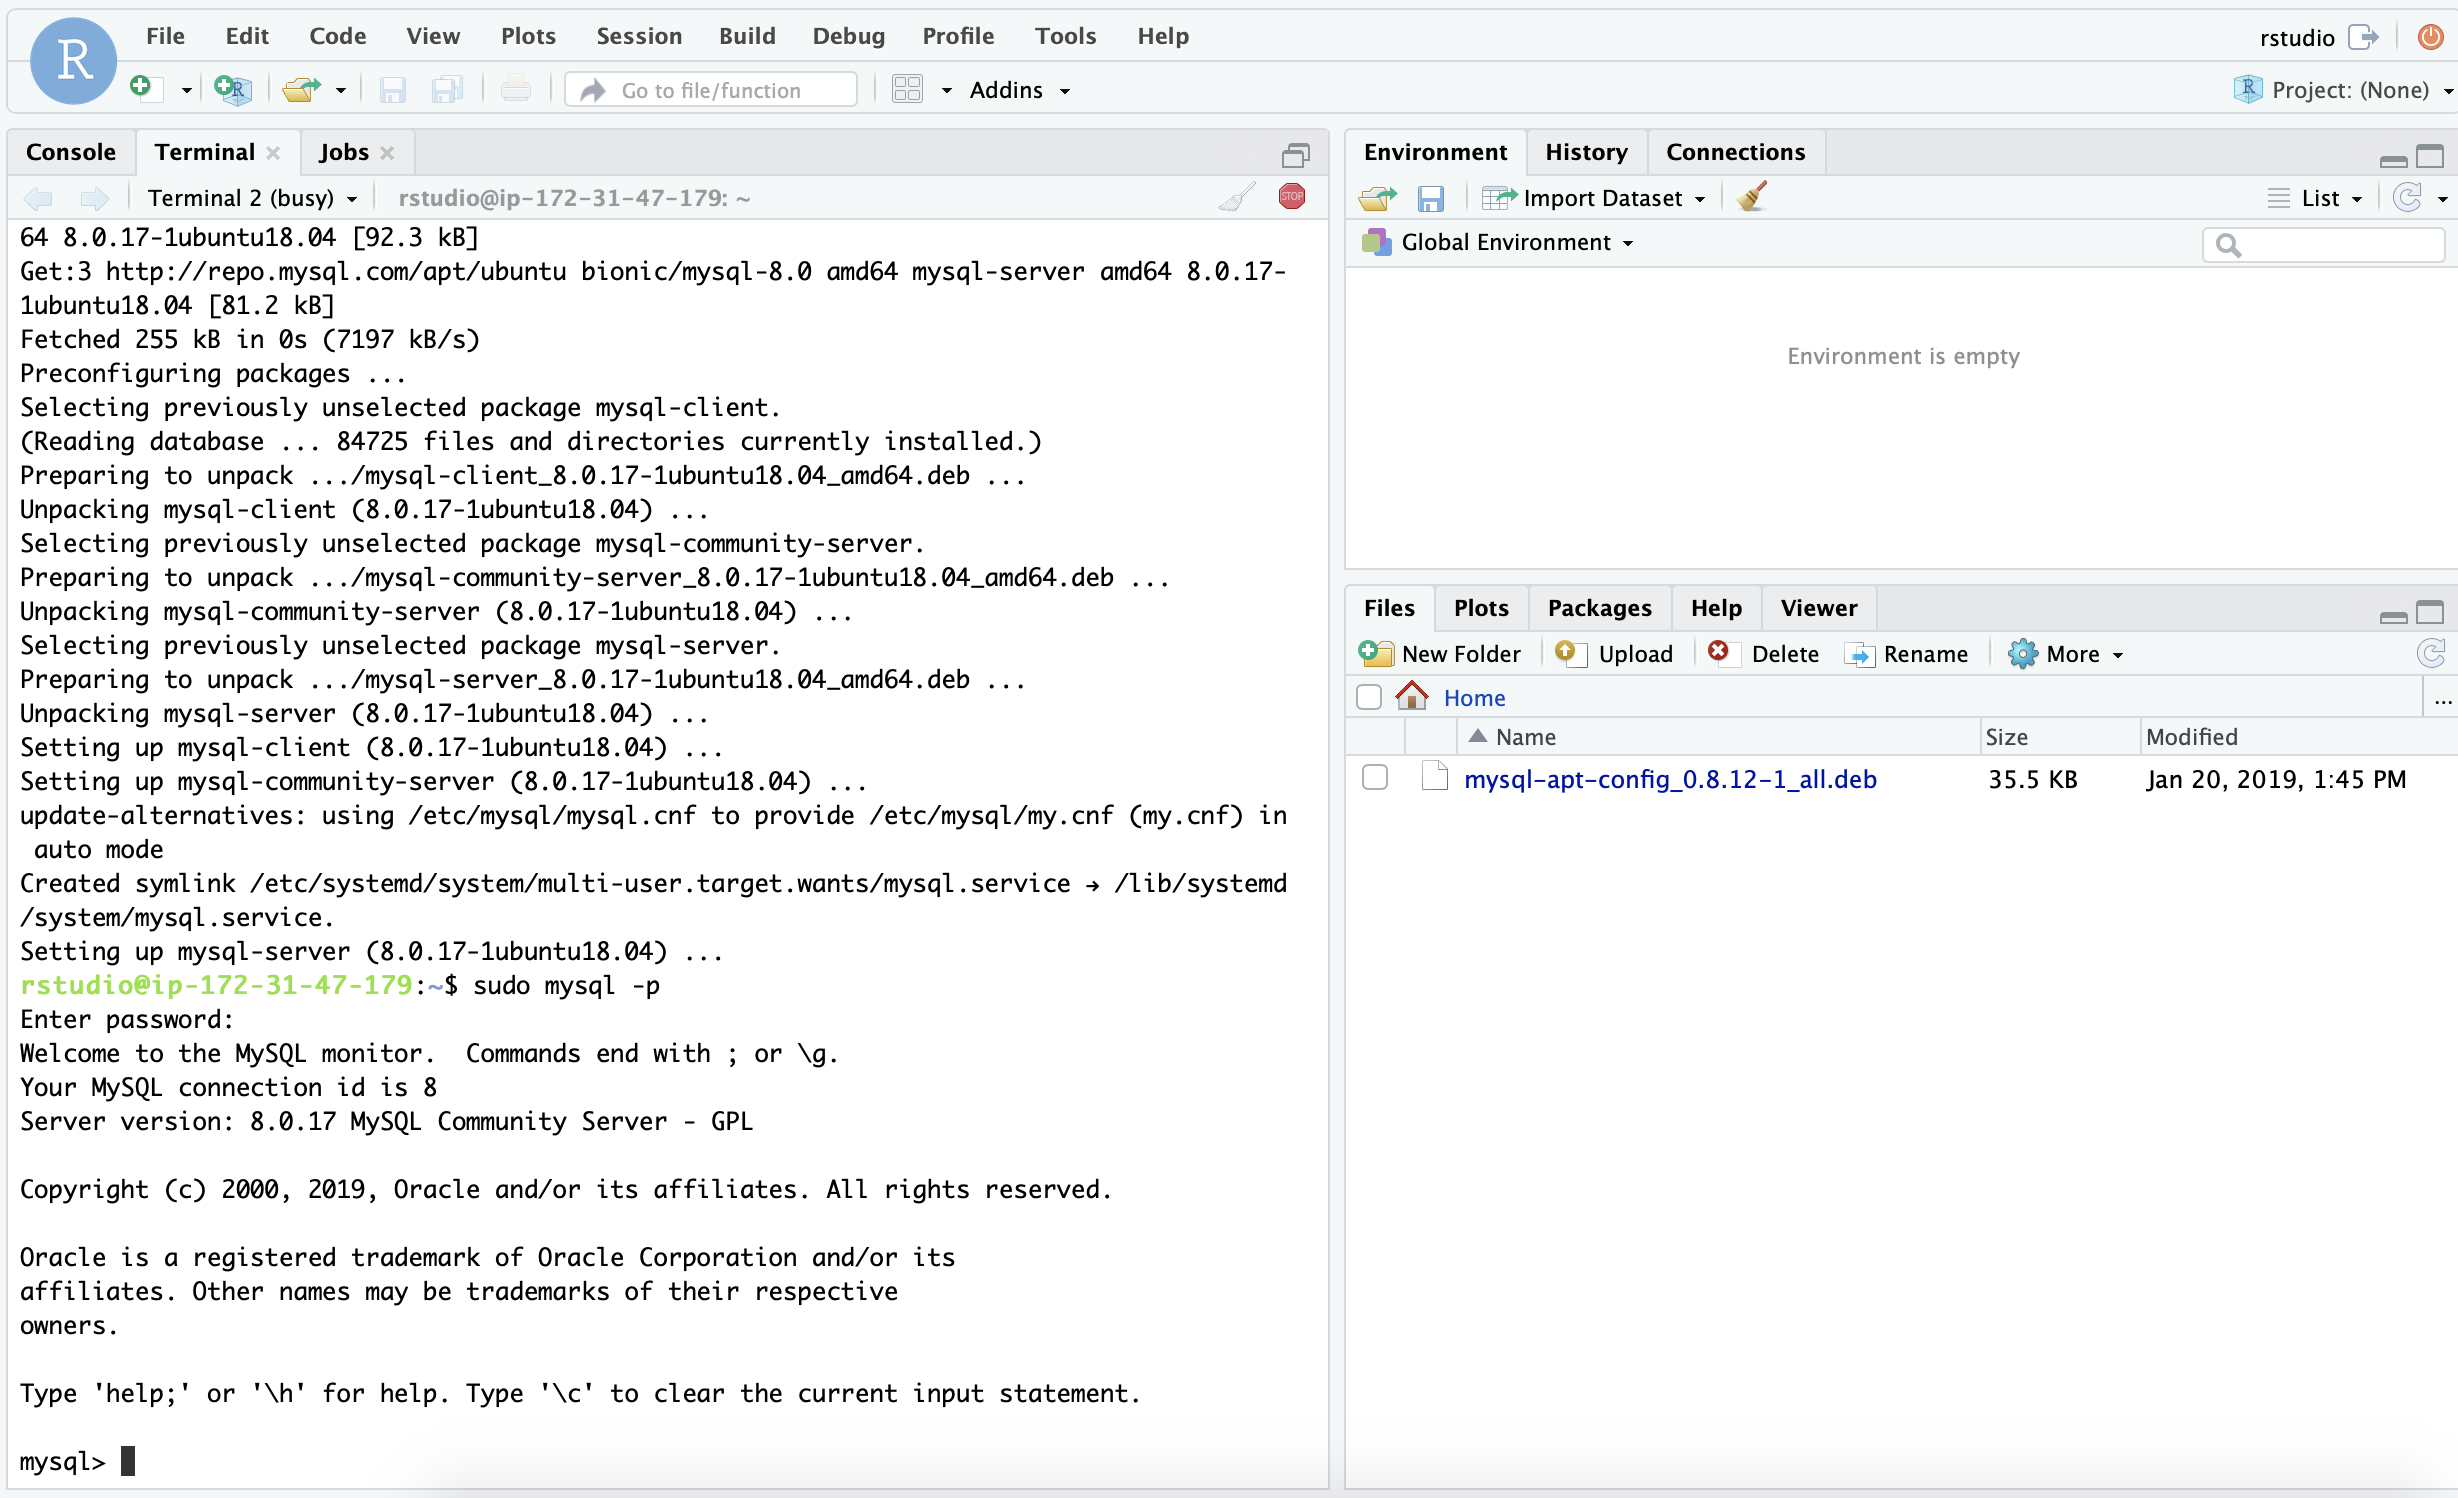
Step 12: Checking if an installed package works?
RStudio and MySQL are working well, so lets see if those useful packages we installed earlier are also working. We should see a datatable if everything went as planned.
library(RCurl)
data <- read.table(textConnection(getURL("https://cgiardata.s3-us-west-2.amazonaws.com/ccafs/amzn.csv")), sep=",", header=FALSE)
head(data)
## V1 V2 V3 V4 V5 V6
## 1 1/15/2014 395.87 2677150 398.94 399.310 392.534
## 2 1/14/2014 397.54 2339458 392.13 398.630 391.290
## 3 1/13/2014 390.98 2843810 397.98 399.780 388.450
## 4 1/10/2014 397.66 2678085 402.53 403.764 393.800
## 5 1/9/2014 401.01 2103029 403.71 406.890 398.440
## 6 1/8/2014 401.92 2316220 398.47 403.000 396.040Perfect! The “RCurl” package installed correctly or else we would have gotten an error here. You can continue to play around here to see that everything else installed correctly.
Wrapping it up
As I mentioned earlier, we can now do our data analysis (and access MySQL in RStudio if you did the optional steps) on any browser, anywhere and at any scale. This post was a lot to take in especially if you decided to try both the short and easy + detailed long way. I’ve decided to save some content for a separate post, such as setting SSL (HTTPS) on port 443 for RStudio and Shiny instead of the unencrypted HTTP, in addition to deploying friendly shiny apps on AWS!
Thanks for reading if you made it this far, and I hope you can now deploy AWS EC2 instances with R, RStudio, and optionally MySQL for free!
